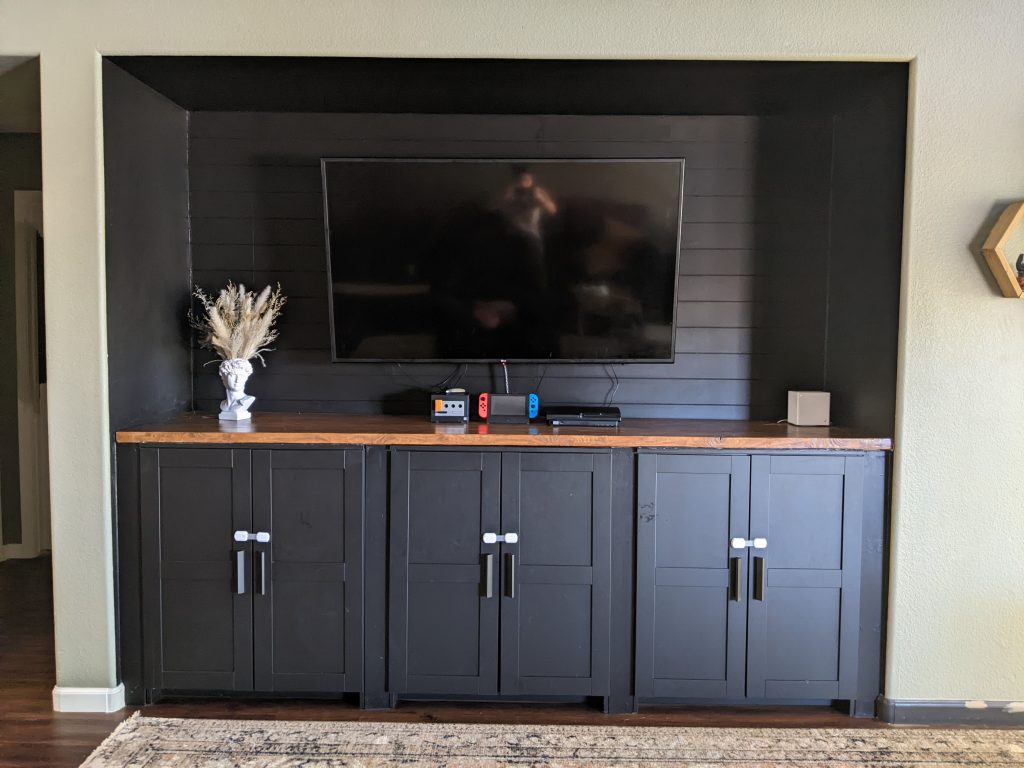
We’ve built an entertainment center using Brimnes Ikea cabinets and are in LOVE with how it turned out! All the materials, including the cabinets, cost us about $600. This project happened before I ever even thought of making a blog, so I don’t have as many photos as I would have liked for this post, but I will do my best to explain our process!
I will not be including any of our dimensions because it is very unlikely that your situation would require the same dimensions as ours. This post will be more of a general explanation than a step-by-step guide.
Vision
First, I figured out the look I was going for. I knew I wanted it to have black shiplap with some wood accents. I also wanted the cabinets to be pushed to the front of the wall cavity, with some room behind them for wires. Most of my inspiration for this project comes from Pinterest, of course!
Brainstorming Materials
Once I had a general idea of how I wanted our entertainment center to look, I took measurements of our wall cavity and began looking for cabinets that would be suitable for our dimensions. The Ikea Brimnes Cabinets were our best option because they were the right color, price, and size. Each cabinet was only $99! Our Wall cavity was able to fit 3 of them with some space in between them that we could fill with 1X3 pieces of wood and some caulk.
I wanted shiplap to cover the wall behind the TV, so I started looking for ways to achieve the look. I decided that shiplap panels from The Home Depot was our best bet. It was significantly cheaper than buying shiplap boards, and the ease of installation was great!
I’m going for warm, earthy tones in our house, so I knew I wanted a wood countertop in our entertainment center to help it tie together with the rest of our furniture. I decided to glue three 2×10 boards together and stain them for the countertop. We used Varathane Early American Wood Stain
We also needed a way for wires to go through the counter to the outlets behind the entertainment center cabinets, so we needed some hole covers for wires.
Our Supplies
- Ikea Brimnes Cabinets
- 2×4 Wood (for framing)
- 1×3 MDF Boards (for spacing between cabinets)
- Black Paint (color matched at Home Depot to match the cabinets)
- Shiplap Paneling
- 2X10 Wood (for entertainment center top)
- Wood Glue
- Wood Stain
- Polyurethane
- Doweling Jig and Dowels
- Wire Hole Covers and Jig
- Pocket Hole Jig and Screws
- Trim Caulk
- Panel Glue
- Nail Gun
- Circular Saw
Measure
First, I measured the wall cavity and determined how much room our cabinets would take up. We determined how much space to leave behind the cabinets for wires, and how much space would be left on each side of the cabinets. This helped me determine how many 2x4s and MDF boards we would need.
I also took measurements of the wall I was going to cover with shiplap. Then I determined how many shiplap panels I would be needing.
Once I determined how far forward the cabinets would sit in the wall cavity, I could determine the dimensions of the wooden counter, too.
Build
We used 2x4s and pocket holes to build the framing, and then screwed the cabinets to the frame.
We cut the MDF boards to length and used a nail gun to attach them to the 2×4 frame. Then, we caulked the gaps where it was necessary.
We cut the shiplap paneling to size, used panel glue and a nail gun to secure the shiplap. This part was definitely a two-person job.
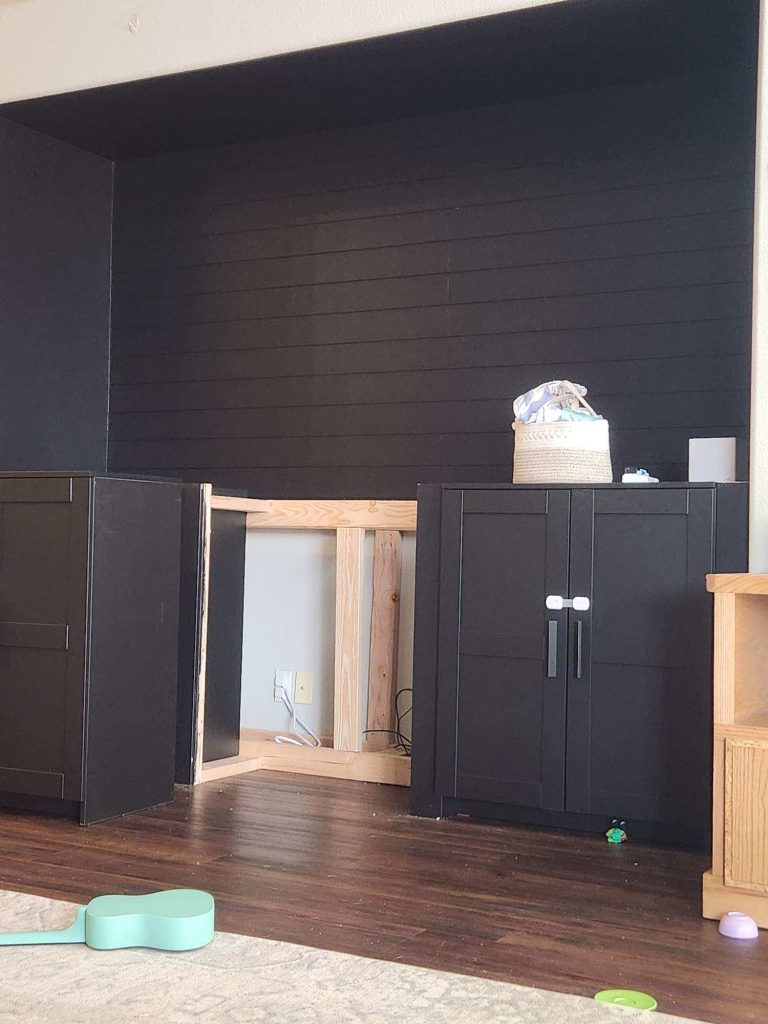
I color matched the Black Brimnes cabinets and painted the sides of the cavity, shiplap, and MDF boards to match.
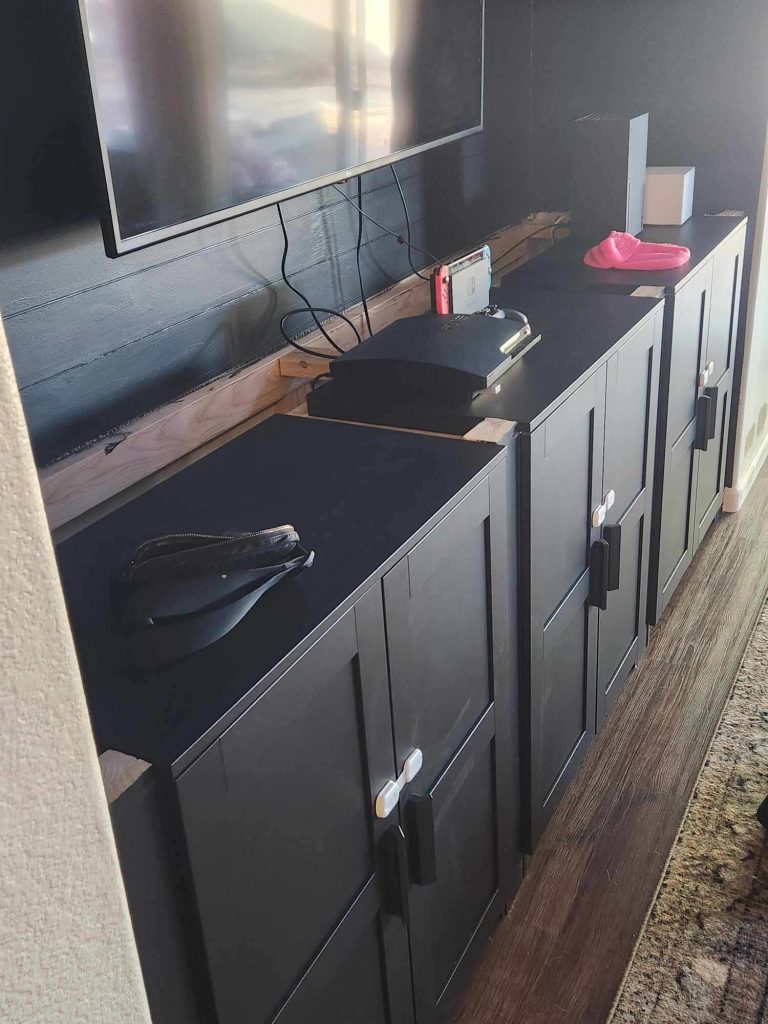
At this point, the only thing left to do was build the counter and stain it! We took the 2×10 boards and squared the edges using a saw. Then we glued them together using dowels and wood glue. After the glue dried, we sanded them pretty well, stained, and sealed them. This process took a few days.
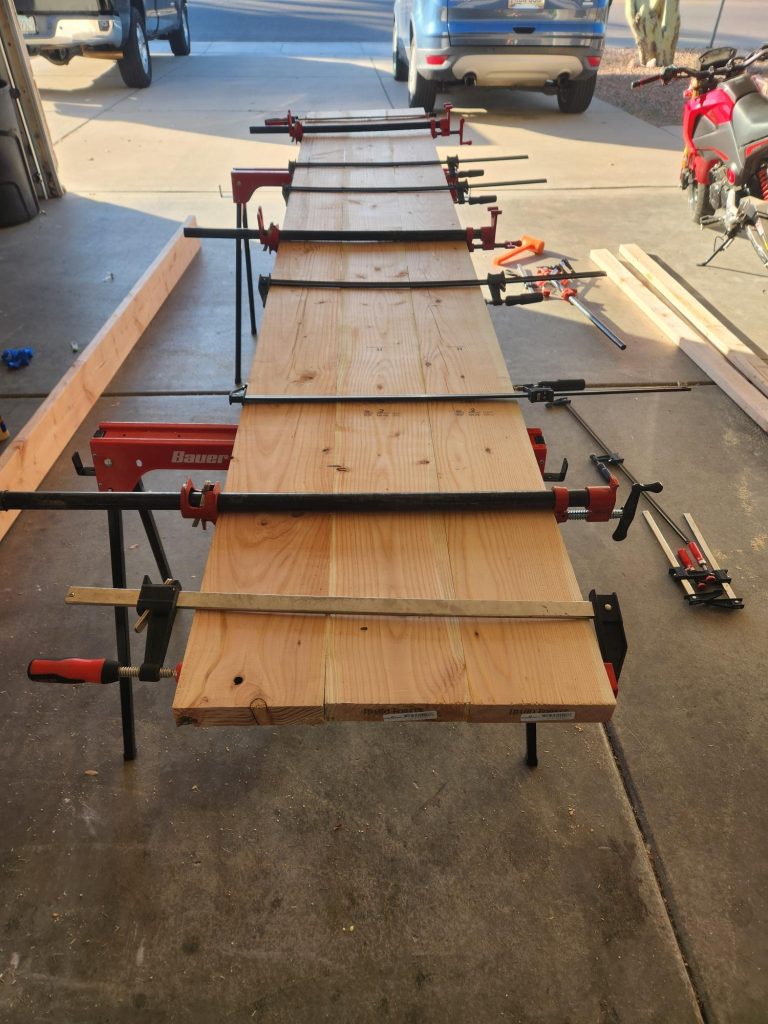

Once the counter was dry, we drilled holes for the wires and glued the counter to the cabinet tops and frame. We were done!
Yay!
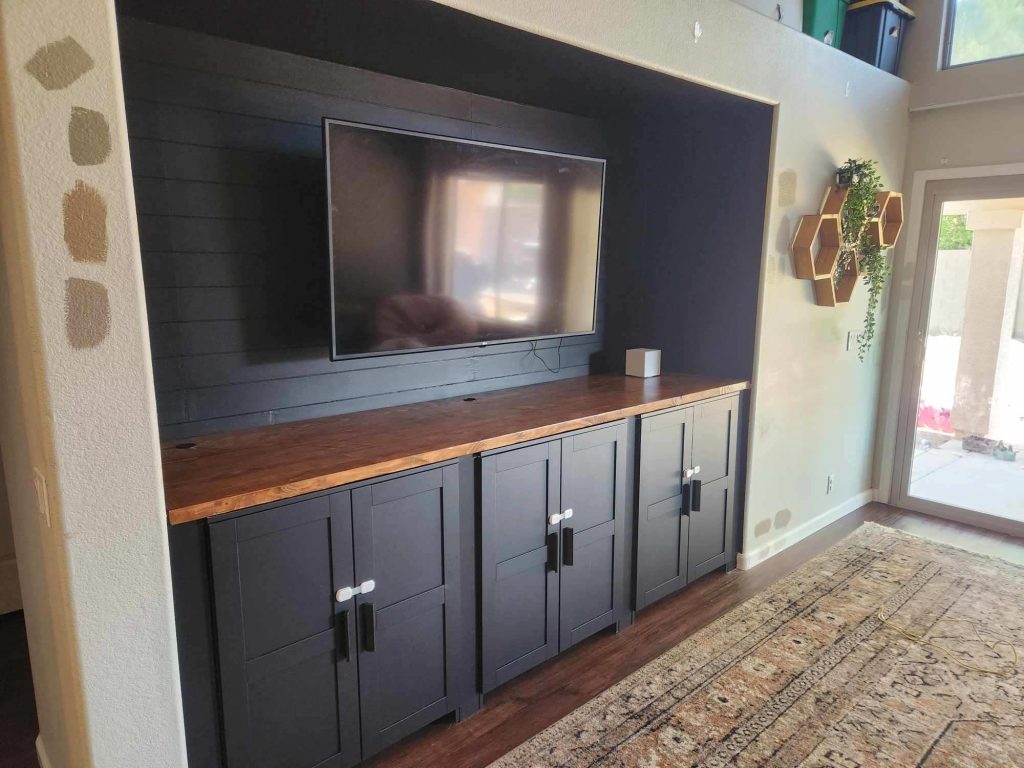
We loved how this project turned out!! We get compliments on it all the time and people are always surprised when we tell them we did it all for just $600! It definitely gives our home more personality.
Let me know if you try this out yourself! Thanks for reading!
Check Out More DIY Projects Here!

Leave a Reply