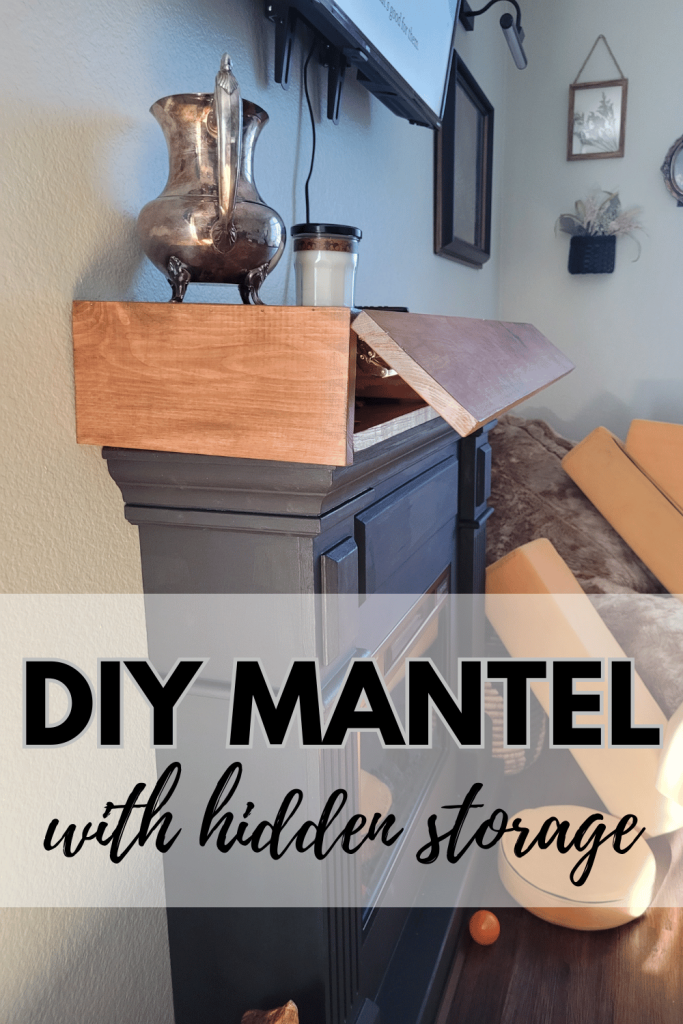
Hey everyone! Moving into a new house has definitely sparked my love for DIY projects, especially when it comes to creating a cozy vibe around the fireplace. As a stay-at-home mom of two, I wanted a functional and stylish solution, so I decided to take on a project I’d never tried before: building a DIY mantel with storage!
I am adding this mantel to a manufactured fireplace that I “built-in” to my wall and baseboards! Click here to see how I did it!
I love the way it turned out, and today, I’m excited to share the steps with you in case you’re looking to add a DIY wooden mantel to your home, too.

Why I Chose to Build a DIY Mantel with Storage
When we bought our manufactured fireplace on Wayfair, I had a vision for how I wanted to customize it. Adding a DIY wooden mantel gave me a way to add hidden storage and wire management for a sleek, organized look. Now it’s perfect for hiding cords and keeping the space clean and cozy.
Materials for My DIY Mantel with Storage
Here’s what I used to create this DIY wooden mantel with a hidden storage compartment:
As an Amazon Associate, I earn from qualifying purchases
- 1×12 wood boards (for the top and bottom)
- 1×6 wood boards (for the sides)
- 2×4 wood boards (for supports)
- Wood glue
- Brad nails and nail gun
- Pocket hole jig kit
- Hinges (for the front panel)
- Stain (Early American)
- Satin polyurethane
- Sandpaper
- 2” hole drill kit and covers (for wire management)
Also, Here is a link to an electric fireplace and mantel that I recommend. Mine is from Wayfair, but I ended up having to paint it black myself. The fireplace I am linking one that I wish I bought!
Building the Frame for the DIY Wooden Mantel
I started by measuring the manufactured fireplace so that the mantel would fit around it snugly. Here’s a breakdown of the steps for building this DIY mantel with storage:

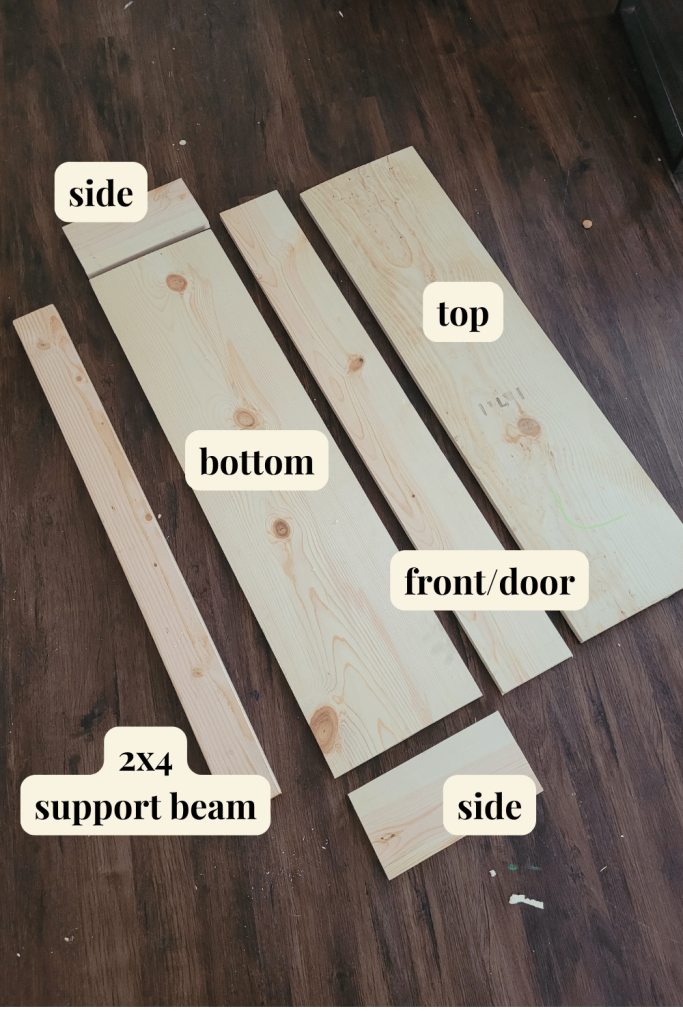
Cut the Top and Bottom Boards
I used 1×12 boards for the top and bottom of the mantel. I cut these to fit the width of the fireplace and left a little extra on each side for a bit of an overhang.
Cut the Side Boards
Using 1×6 wood boards, I cut the left and right pieces to wrap around the 1×12 top and bottom boards.
Attach the Side Boards to the Top Board
To start creating the body of the mantel, I attached the side boards to the top board with wood glue and brad nails. This frame would become the structure for the mantel and serve as the hidden storage compartment.
Sand for a Smooth Finish
Once the main frame was assembled, I sanded it down to ensure that all the edges were flush and smooth.
Front Panel
I cut a 1×12 front board to overlap the top and side boards so that from the front, all you see is this smooth panel. I left this unattached for now, as it would become the door to our storage compartment.
Finishing Touches: Stain and Assembly
Stain and Seal
I wanted a warm, rustic look, so I stained all of the wood with Early American. This color adds a beautiful, cozy tone to the wood. After the stain dried, I sealed everything with 3 coats of satin polyurethane to protect it from wear and tear.
Bottom Panel and Wire Management
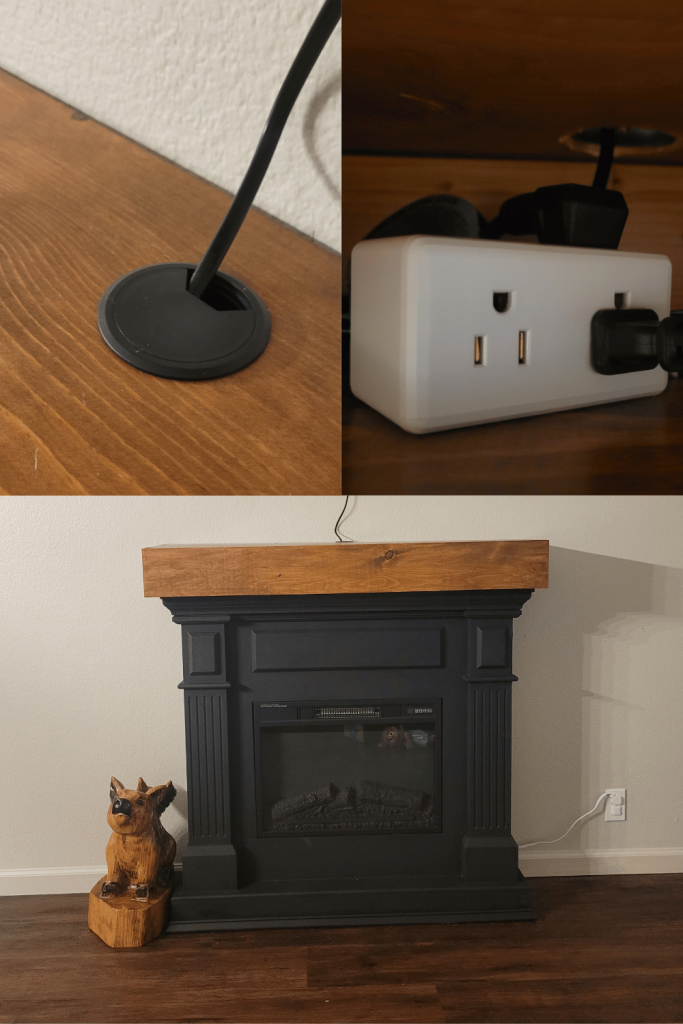
I attached the bottom panel of the mantel directly to the manufactured fireplace mantel using screws and drilled a hole through it, which will allow wires to pass through into the cavity behind the fireplace. The mantel was designed to store an extension cord, which we use to plug in our TV and fireplace. This keeps everything looking organized and clean.
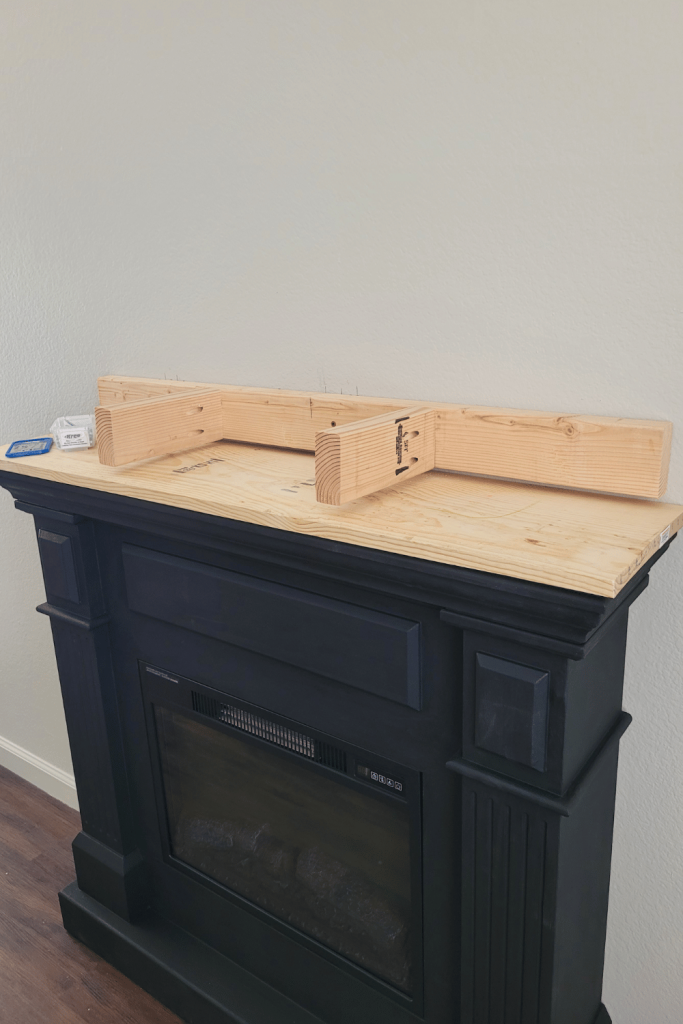
Building the 2×4 Support Frame
To securely mount the mantel to the wall, I used 2x4s and pocket screws to build a ledge and attached it to the studs above the fireplace. This would support the wooden mantel body, so it was important to make sure it was stable and level.


Fitting the DIY Wooden Mantel with Hidden Storage
After assembling the main frame, it was time to do a dry fit to make sure everything would line up correctly.
Dry Fit the Mantel Frame
I rested the wooden mantel frame on top of the 2×4 support structure, making sure it lined up perfectly with the bottom panel attached to the manufactured fireplace. This step was crucial for getting a seamless fit.
Attach the Front Panel with Hinges
After making sure the frame was a perfect fit, I attached the front panel to the mantel frame using hinges. This front panel now functions as a door for the hidden storage space! It took a couple of adjustments to get the alignment just right, but once it was in place, it looked fantastic.
Final Assembly
I also drilled a 2-inch hole on top of the mantel for the TV wires to feed through, and drilled the mantel frame into the 2×4 supports. A hole drilling kit helped so much! It also came with wire management covers. I highly recommend getting it!

Why I Love IT
This DIY mantel with storage turned out to be both a functional and aesthetic upgrade to our fireplace area. I now have a designated spot to keep all the unsightly cords, and a place to put my holiday stockings! And because I designed the mantel with wire management in mind, mounting a TV above the fireplace looks seamless and tidy. The rich, warm wood stain gives our living room that cozy, lived-in feel that I adore.
So, if you’re looking for a DIY project that combines both style and storage, building a DIY wooden mantel might just be the perfect solution! I hope this guide inspires you to try it out and make your fireplace a cozy, organized focal point for the family. Happy DIY-ing!

Leave a Reply